
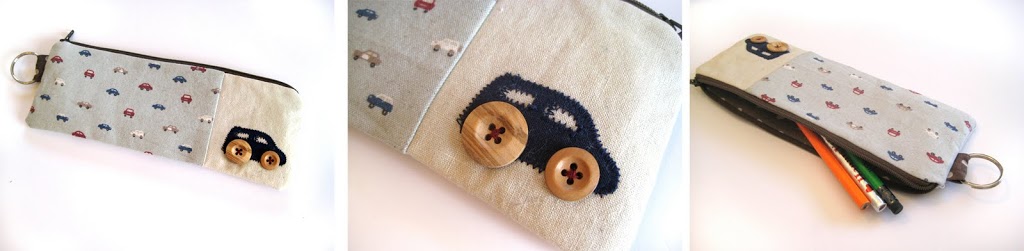
Who loves zippers??! I know you all do! Time for another cute project. There’s just enough time to whip up a couple and add them to your Christmas stockings…
Here’s what you’ll need:
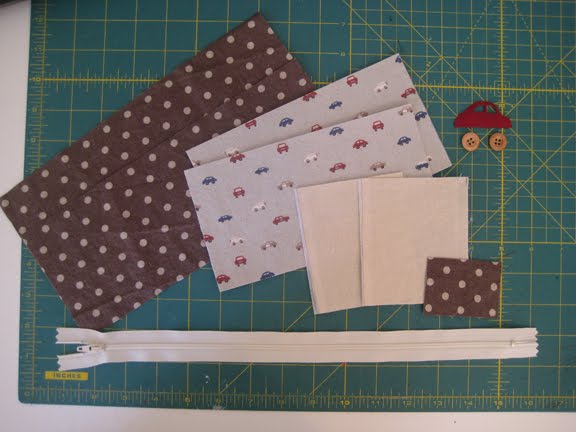
linen scraps, 2 pieces cut to 3.5″ w x 4″ tall
main fabric 2 pieces approximately 7.5″ w x 4″ tall
lining fabric 2 pieces 10.5″ w x 4″ tall
scraps for applique car (or whatever design you want to come up with) and two buttons
an 11″ zipper or larger
scrap of fabric 3″ wide x 2″ tall and split key ring (if you plan on adding the key ring)
{1/4″ seam allowance throughout}

First, grab your scrap of fabric to make your key ring loop. Fold it in half with right sides together and sew. Turn right side out and press with seam in middle. Set aside.
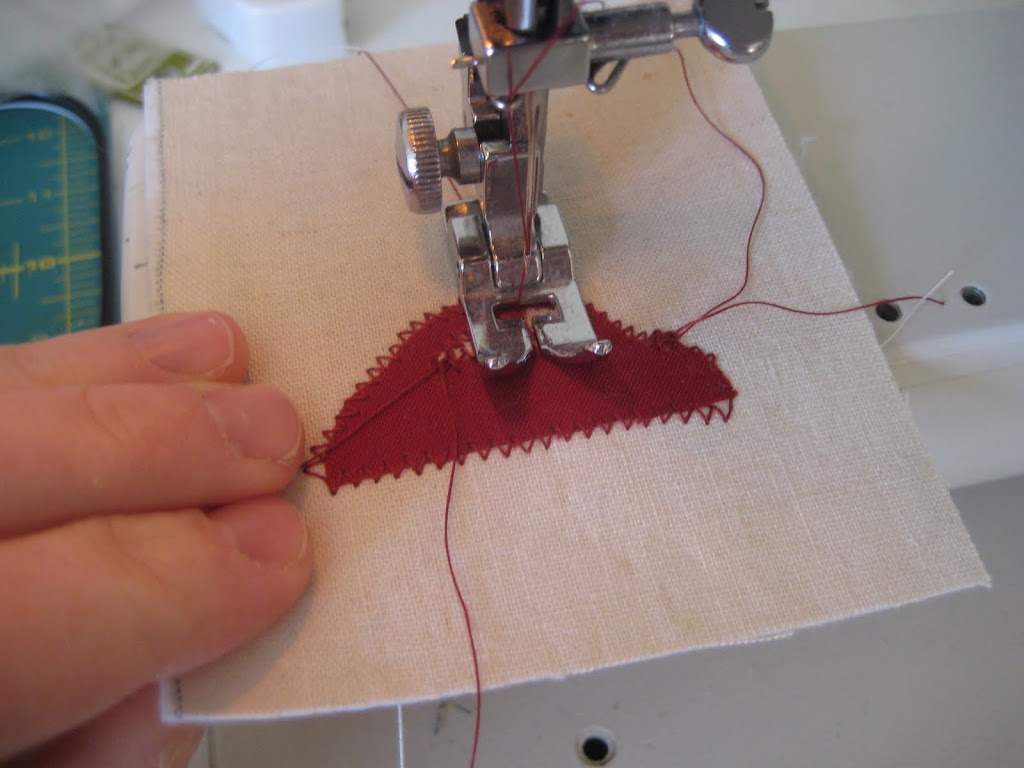
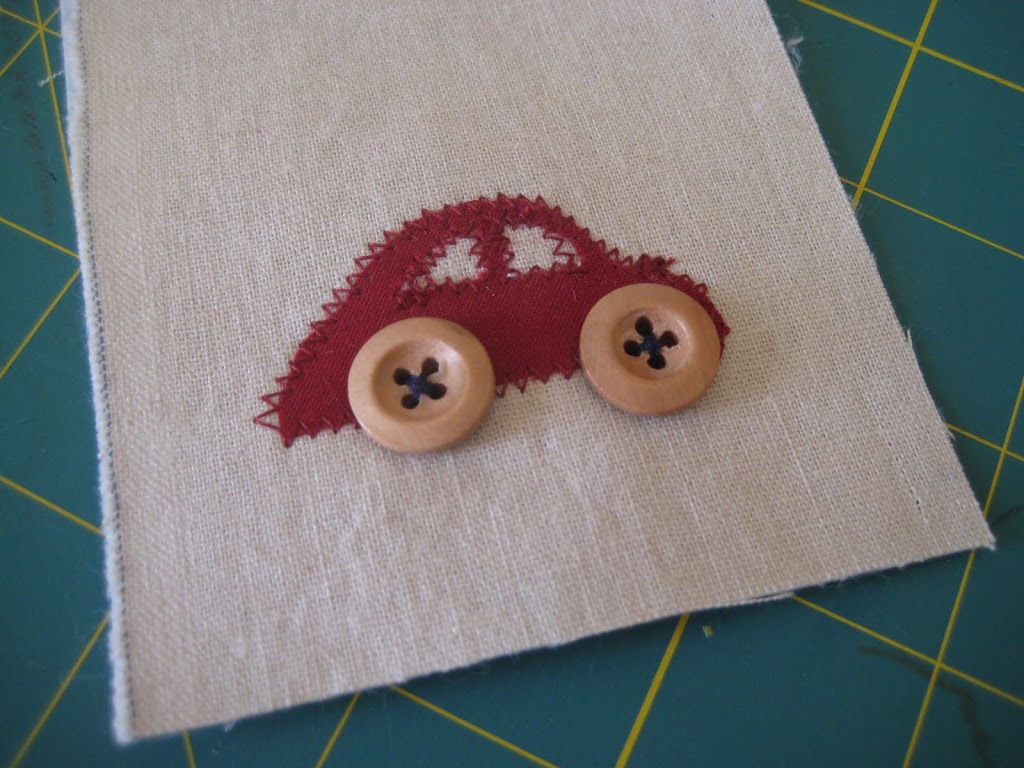
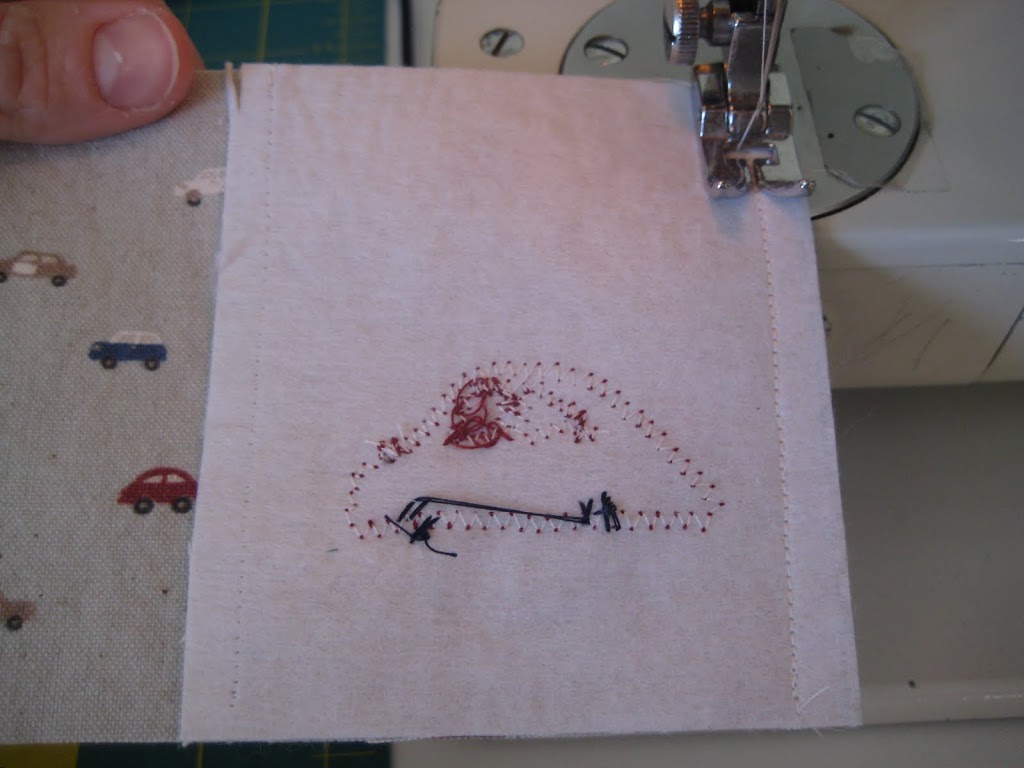
Take one piece of linen and add your applique. I used fusible webbing and ironed it to my scrap pieces then cut them out with an exacto knife. Iron the applique to the linen. Sew around the edges of the applique with a small zig zag stitch. Sew on buttons for the car’s wheels.
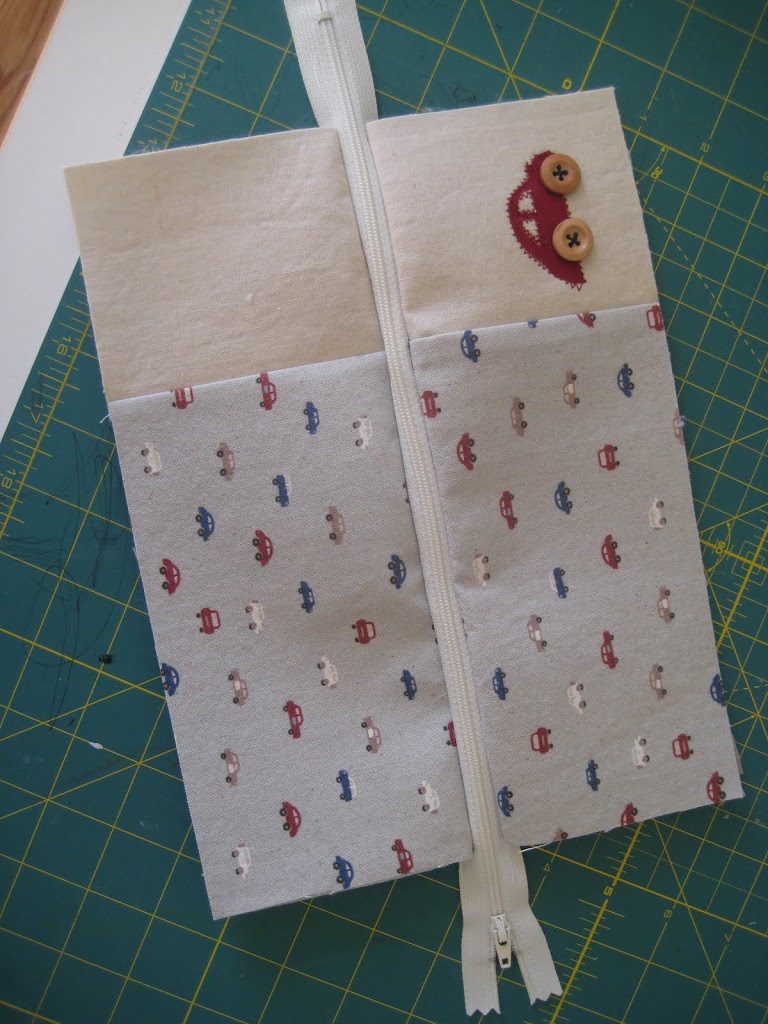
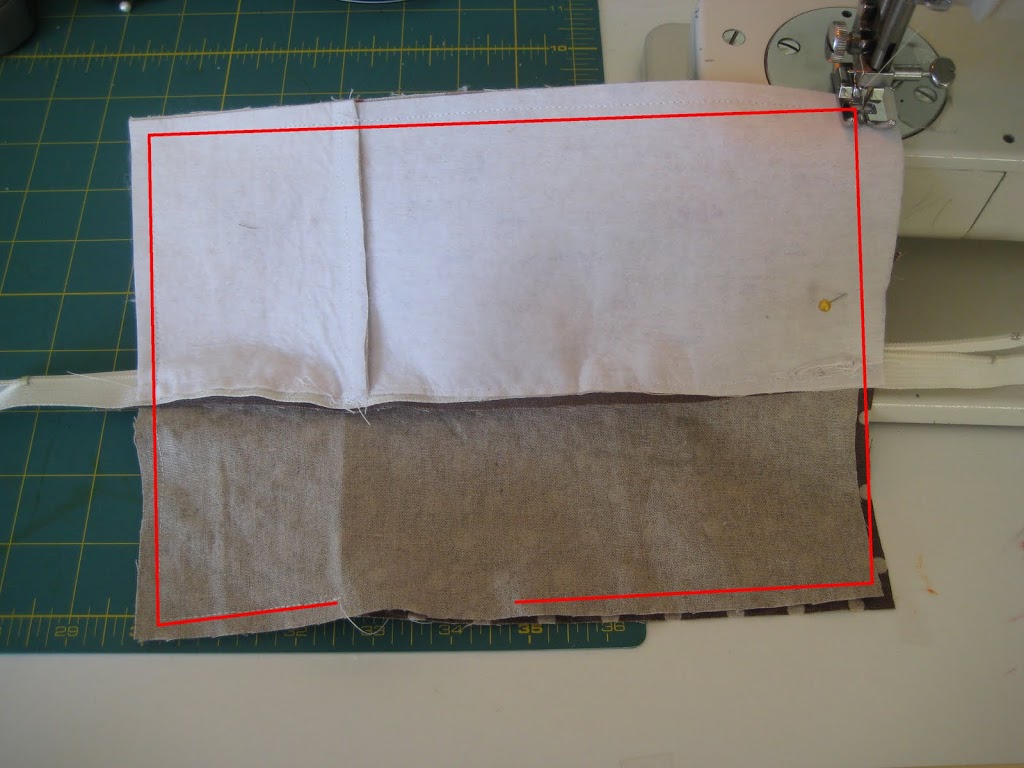
Then, take one main piece of fabric and the piece of linen with the applique on it and place them right sides together and sew.
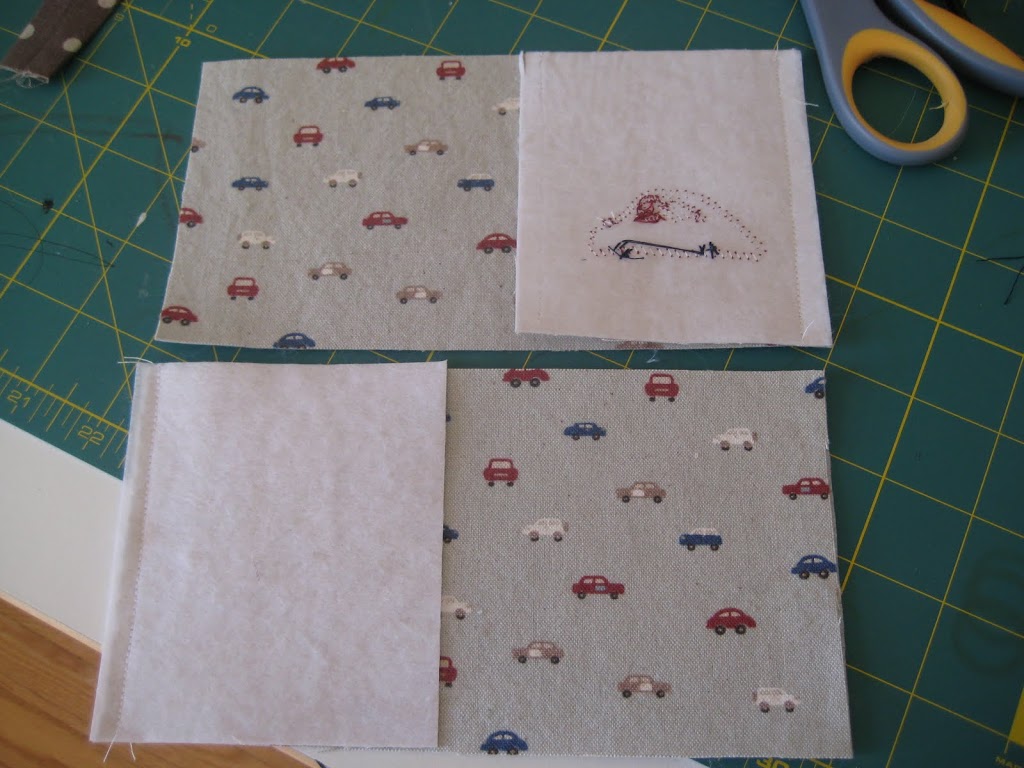
Take your other main piece of fabric and remaining piece of linen and sew with right sides together. Make sure if you’re using a print with an obvious direction (like I have here with the cars) to sew the linen on the other side than what you had sewn the piece with the applique on. {See above picture.}
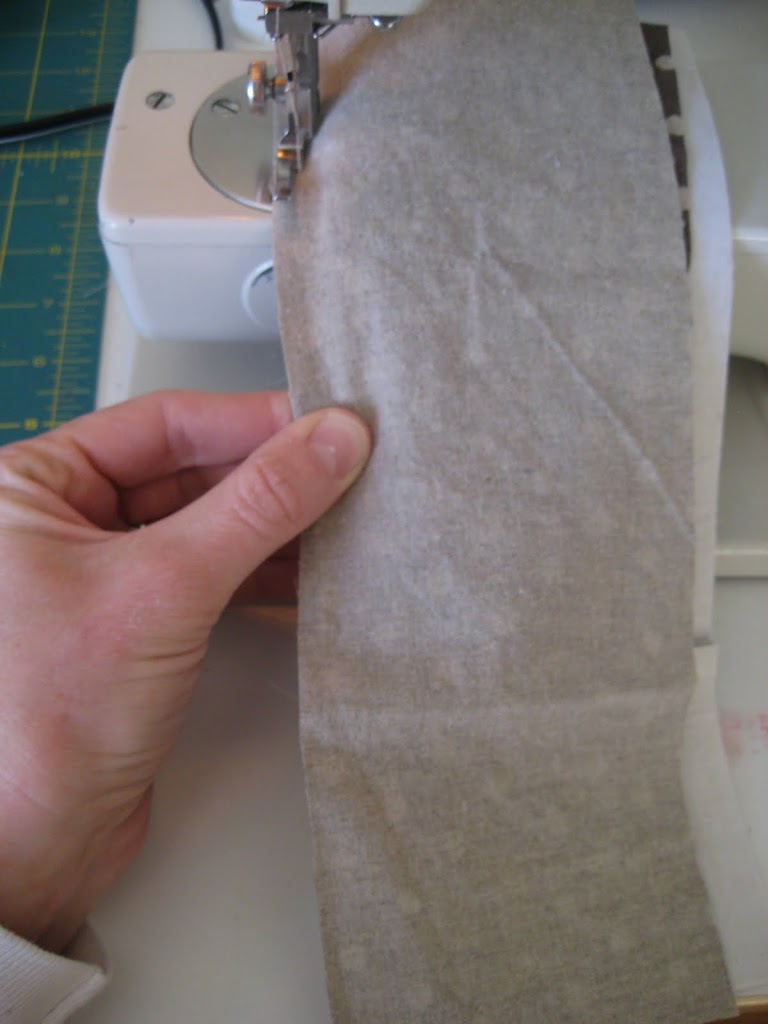
Press seams to one side for both exterior pieces.
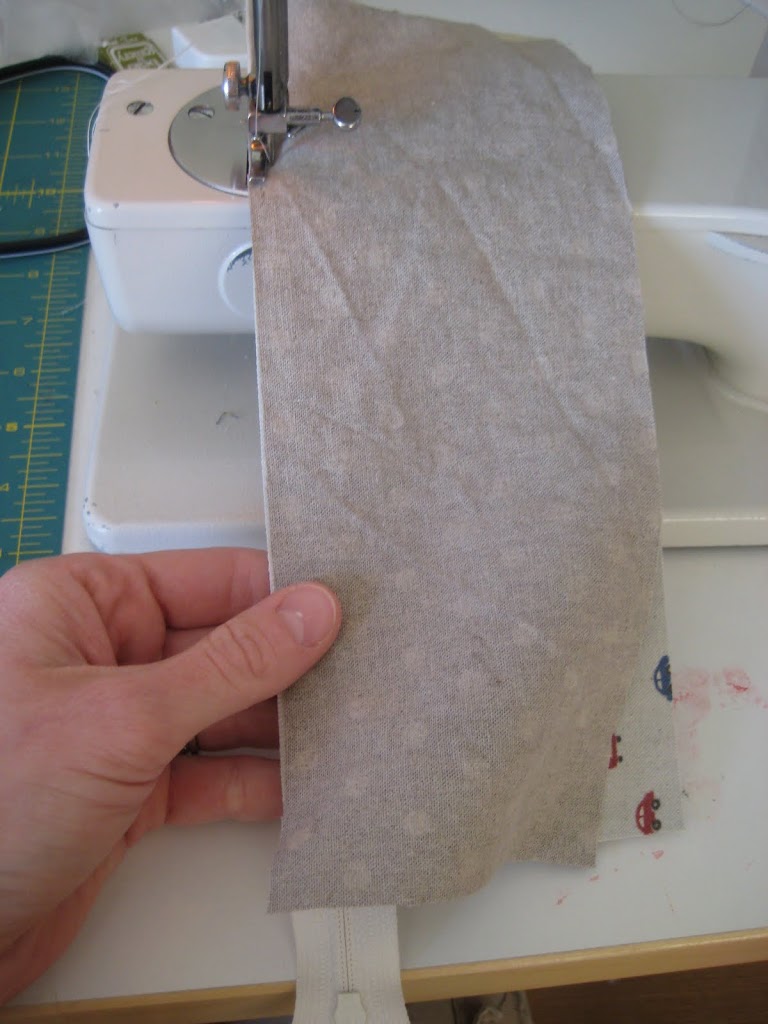
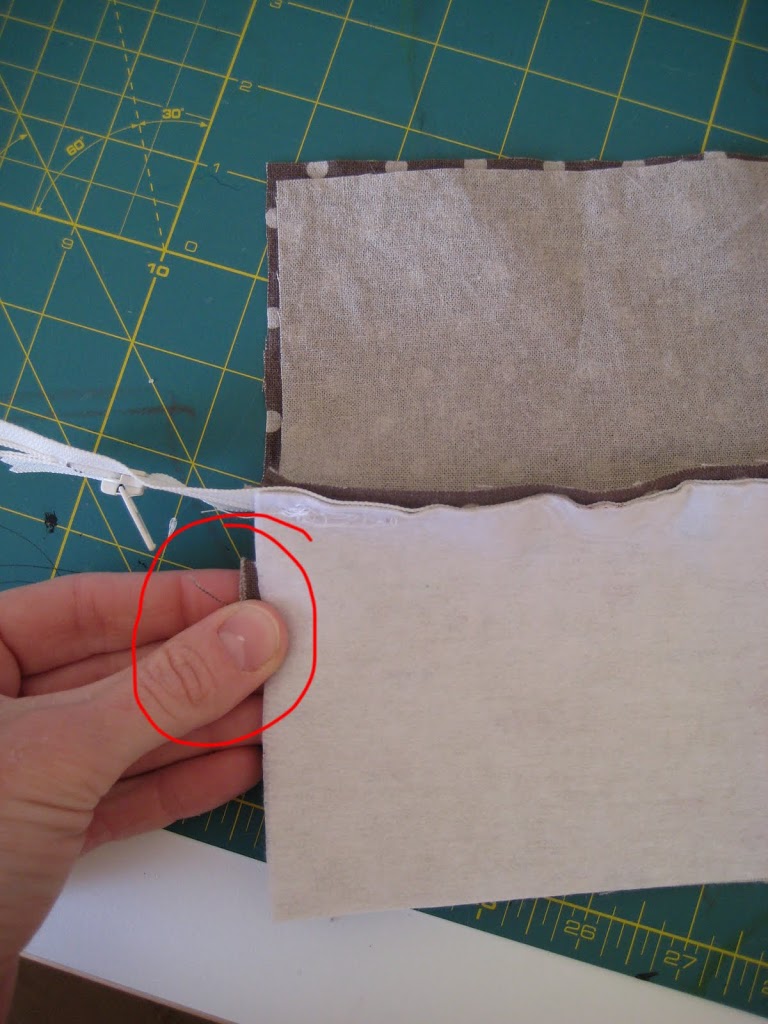
Now onto the fun part! Take your piece of exterior fabric and place it on your work surface right side up. Lay down your zipper along the top edge with the zipper facing down and pull tab at the LEFT. Then place a piece of lining fabric right side down on top of the zipper. Sew using a zipper foot. Flip so wrong sides are facing each other.
Next put down the remaining exterior piece right side up, take your zipper and place it along the top edge with the zipper teeth facing down and the pull tab to the RIGHT. Place the remaining lining piece right side down on top of the zipper. Sew using a zipper foot. Flip so wrong sides are together and press. You should now having something that looks like this:
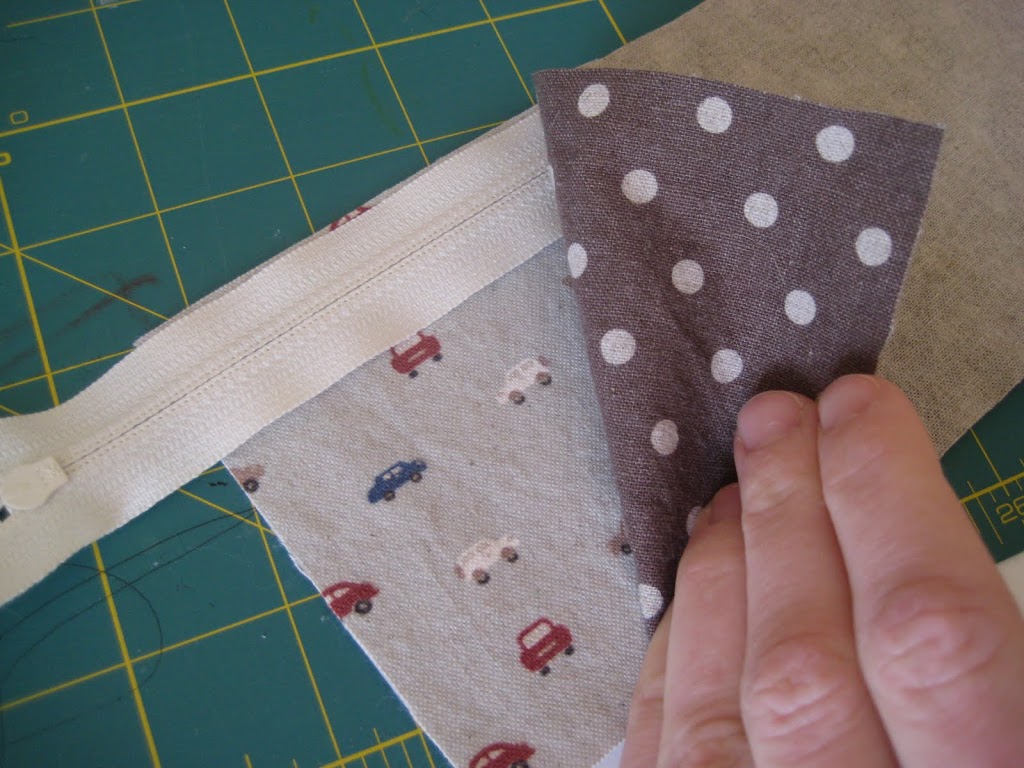
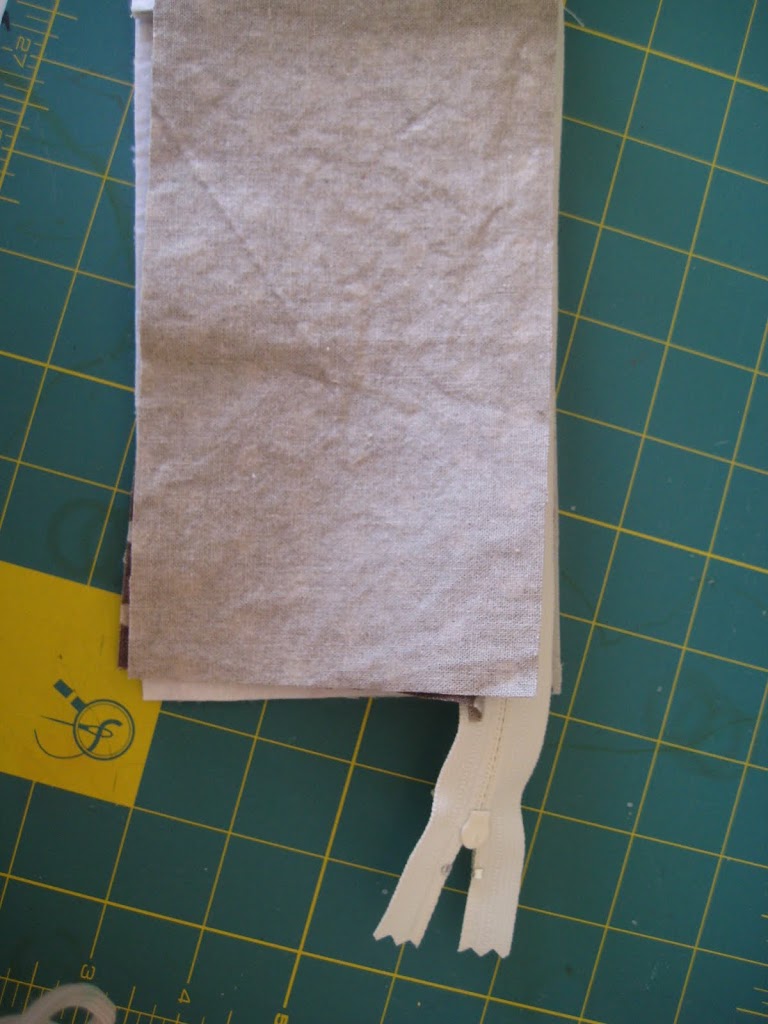
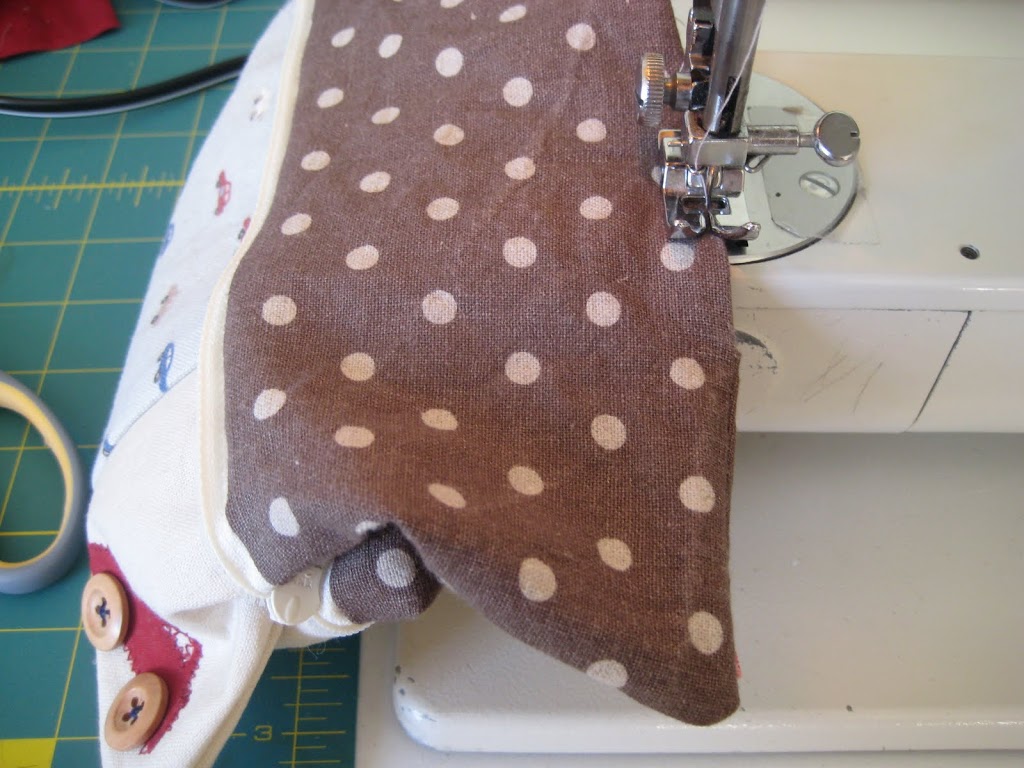
Now’s a good time to open up your zipper about half way. Tuck in your key ring tab on the left hand side between the exterior fabrics with the raw edges facing out and pin.
Now you’re going to sew along the entire perimeter except leave a 2-3″ opening in the lining fabric for turning. Clip corners and trim ends off the zipper so that they’re almost flush with the edges of the pouch. Pull right side out through the hole in the lining.
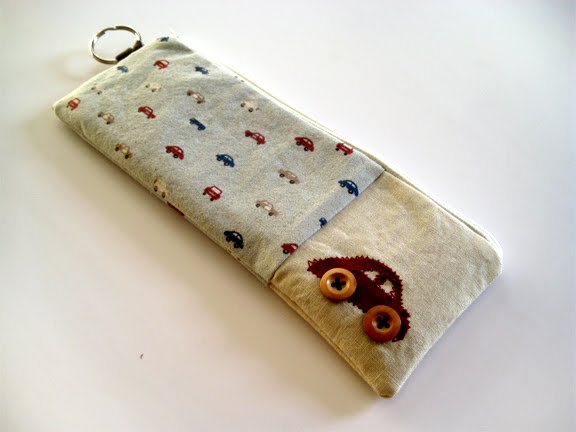
Sew the opening in the lining shut by hand or with a very small seam allowance. Push the lining into the pouch and press! That’s it!
Let me know if you have any questions, I’d love to see what you make.
Cute!! The buttons for wheels is a great touch.
Looks great, I am going to have to try it!
Amazing and the buttons for wheels is really great.
Happy holidays!!
Thanks for the tutorial. I haven’t tried anything with zippers yet but you make it look easy.
Merry Christmas
What a cute little pouch, I adore the little car!!
agh! that little car is too cute!
Are you serious right now?? That is ADORABLE! I can’t wait to feature this on my sidebar tomorrow! :o)
The button cars are super cute!
Cute! Nice tutorial.
great tutorial! thanks for sharing! zippers have always intimidated me, but i loved the way you broke it down. i think i can do that! i’m going to give it another try. thanks for the inspiration!!
blessings,
nori
Love it! Thanks for sharing – it gives me tons of great ideas 🙂
Dear Anna, Thanks for all tutorials. I will try the zippy wallet!
Have to try this too…maybe one to match the backpack?! Time to try zippers!
Great tute thanks!
that is so cute! i will be trying this soon.
I found you via the guest post you did recently.
Great tutorial. Thanks for sharing !
I love this Tutorial!
Thank you indeed for sharing.
Cata
Very cute. I can see one of these for each grand child and maybe a crayon wallet as well. What a fun Birthday gift this could be!
Getting ready for Next Year’s onslaught of 15 birthdays. YIKES!
~a
I looooooooooooooooooooved!!!
I surely will try id!!!
Thanks so much for sharing with us!!!
warm hugsssssssss
Bê[=D
I just found your blog yesterday and made this pencil pouch last night. Your instructions and photos were excellent. I made this in NO time flat. I even made a few modifications to the dimensions to make it fit my purposes. I just posted a pic on my blog, come check it out. I’m very proud! Thanks again!
This is the cutest pencil puch I have ever seen. Perfect for back to school ;).
Thanks for this tutorial. I am so glad that a beginner like me following it with little modification (in size) and able to complete my very first handmade pencil pouch.
Amei o Tutorial!!!
Obrigada
http://ivanasuda.blogspot.com
Hi Anna! Made a few of these pencil pouches yesterday. Thanks for the tutorial!!
Kate
http://betweenthetoys.blogspot.com/2011/06/pencil-caddy.html
Thank you for a great tutorial! I’ve made four of them, and I cant wait to make some other – it’s a great gift
thank you very much for your great tutorial. i’ve made one for my friend..and i would love to make it some more…by the way, i’m from malaysia =)..thnx again ya!!
Turned out great. Do a flower for a girl insted of car.
Where did you get the car fabric??
on etsy!
Love it
VERY cute! I am going to have to give that a try. I have only worked with zippers in clothing and I have wanted to try it out on bags but have been a little intimidated…..
THANK YOU for sharing!
Very pretty pencil pouch. My kiddos will love this. I might just copy your idea.
i enjoyed made this pencil pouch and have nice result. thank you for your great tutorial. it’s help me a lot. now i don’t have to buy pencil pouch. lol.
Great pouch ! My grandson is in to bugs right now! So l need to get some bug fabric. ?